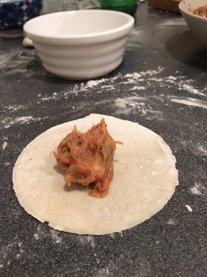
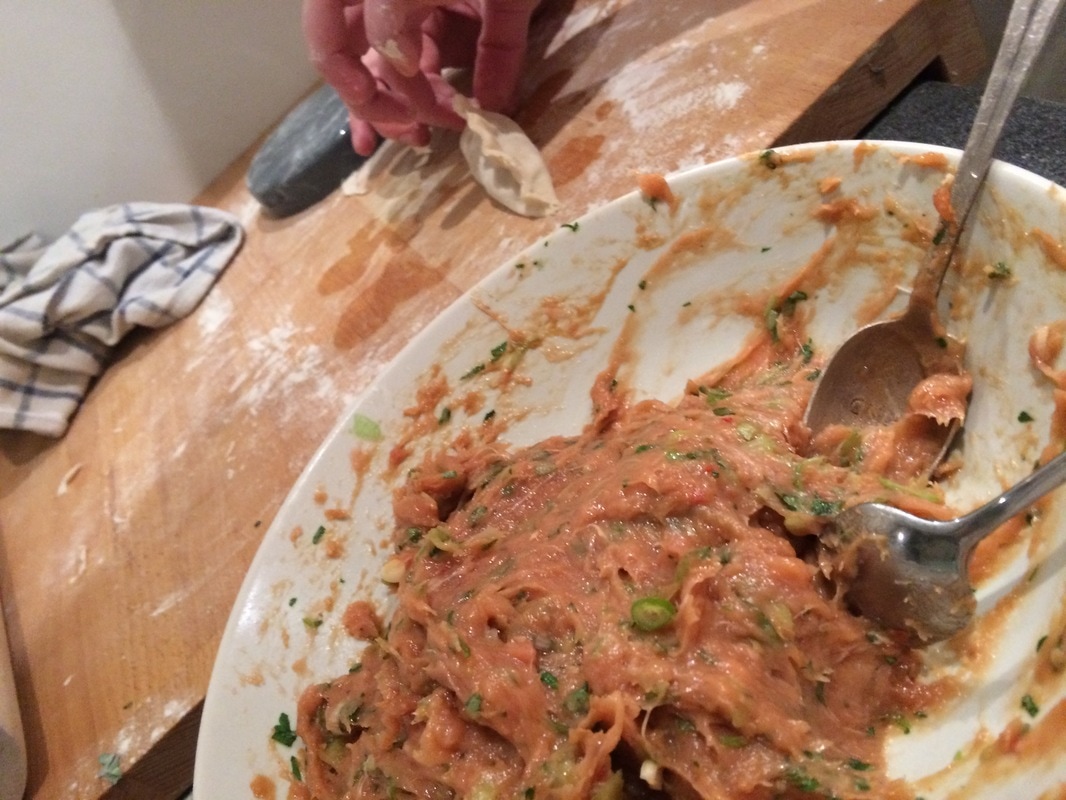
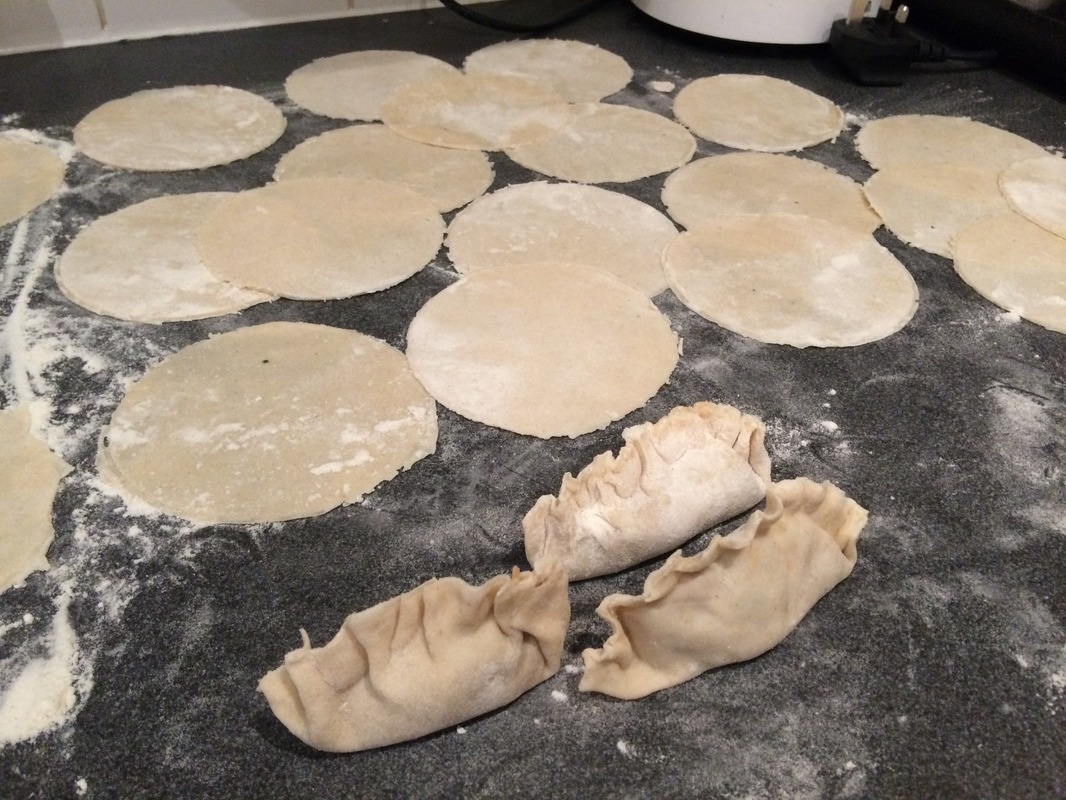
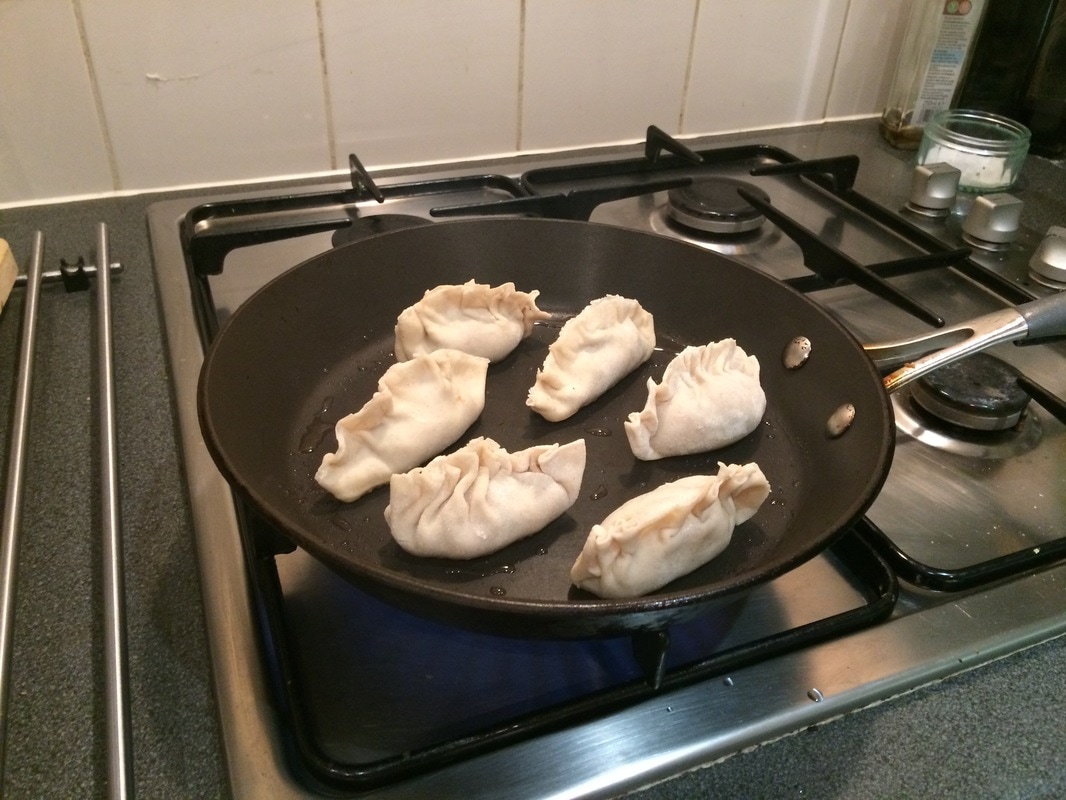
 On a Sunday my good friend and I have a ritual where we cook up something that we wouldn't normally, usually something a little more difficult and different than our in week dinners. My next challenge/promise is to take more photos of our Sunday creations and put all the recipes we try up here for you lovelies! Yesterday we decided it was time to try some pot-sticker dumplings, Gyoza, as they are a firm favorite of ours to order at a restaurant and at markets. We love The Gyoza Guys, Saturday and Sunday at Maltby Street Market. Most of our home cooked meals are of Asian influenced from colourful Laksa curries to fragrant salads with crispy beef. Even though we cook Asian food on a regular basis we were apprehensive to give these a go as the wrappers look seriously hard to make from scratch. Surprisingly a lot easier than we first thought. Well, apart from the crimping... Many a Youtube video were watched last night trying to get it right but alas there is definitely a trick and a fine art to crimping the edges of a dumpling! So please do excuse the dumplings that look like they have been crumping. Yes the dancing style rather than crimped. This post may be called Dumplings for Days but in fact they lasted a total of 15 minutes even though there were 24 of them. If you can hold out they can be kept in the fridge for 3 days or frozen for 3 months and make an easy lunch time treat. Below are the slightly modified recipes for the dumplings, feel free to click the hyperlink to visit the sites where I got the recipes from. A dipping sauce and an easy Japanese mayo recipe are also below. Once you know how to make the wrappers and can judge the consistency of the filling, the options are really endless. Next time I think we are going to try chicken and chive. What fillings can you think of? Let me know in the comments. Happy dumpling eating. Love Steph xxx Pork and Prawn Potstickers Makes: 24 Ingredients: 1 large garlic clove, roughly chopped 4cm fresh root ginger, roughly chopped 1 red chilli, deseeded and roughly chopped 200g raw jumbo king prawns, deveined and finely chopped 200g minced pork 28g pack coriander, finely chopped 3-4 salad onions, finely sliced 1 tbsp soy sauce 2 tsp corn flour dash sesame oil For the wrappers: 175g plain flour, plus extra for rolling 2 tbsp sunflower oil for frying For the dipping sauce: 4cm piece fresh ginger, julienned or cut into thin matchsticks 2 tsp chilli/sesame oil 2 tbsp soy sauce 2 tbsp balsamic vinegar 2 tsp rice vinegar Method. 1. To make the wrappers, tip the flour into a bowl with a pinch of salt. Gradually add 175ml very hot water, mixing until the dough is no longer sticky. (You may need to add a little more our or water to achieve the right consistency.) Knead for 2-3 minutes until smooth, return to the bowl, cover and leave to rest for 1 hour. You will know when it is ready when is looks smooth, and slightly waxy. 2. For the filling, pulse the garlic, ginger and chilli in a food processor until finely chopped. Add half the pork, pulsing to combine, then scoop the mixture into a bowl. Add the coriander, finely chopped prawns, the rest of the pork mince and salad onion and mix together. 3. In another small bowl, mix the soy sauce with the corn flour until smooth, then mix into the filling along with a dash of sesame oil. Cover with clingfilm and chill until needed. 4. Mix all the dipping sauce ingredients in another bowl; cover and set aside. 5. Lightly dust the work surface with flour, turn the dough out of the bowl and knead again for 30 seconds. Cut the dough in 1⁄2 and, using your hands, roll each piece into a sausage about 2cm thick. Cut each sausage into 12 evenly sized pieces. 6. Dust the work surface with flour and roll out each piece to a rough circle about 0.1cm-0.2cm thick. (You will need to keep flipping and turning the dough, and dusting with flour, to prevent sticking.) Use a 10cm round cookie cutter to stamp out a neat disc from each piece of dough, and lay each wrapper on a lightly floured tray as you go. 7. Don't worry about keeping the off cuts from the wrappers, on the 2nd round the dough has been over worked and won't roll out correctly. 8. Working in batches, lay 6 dumpling wrappers on the work surface and place 1.5tsp filling in the middle of each. Brush the edges with cold water, fold over and pinch together to seal the filling into a half-moon shaped dumpling; crimp the edges. (https://www.youtube.com/watch?v=2l2HhzDG2aE this is the Youtube video we used to try to crimp!) Place on a lightly floured tray while you prepare the remaining dumplings. 9. Heat 1 tbsp oil in a large frying pan and fry 1⁄2 the dumplings over a medium heat for about 2 minutes (or 3 minutes from frozen), until golden underneath. Add 3-4 tbsp water to the pan, then cover immediately and continue to cook for a further 4 minutes (or 8 minutes from frozen), until piping hot. Remove from the pan and cook the remaining dumplings in the same way. Serve at once with the dipping sauce. Japanese Mayo 1 cup mayonnaise - I use the light mayo from Lidl 2 Tbsp rice vinegar 1 Tbsp caster sugar Whisk all ingredients together until the sugar dissolves It is not exactly the same as that amazing mayo you get in sushi restaurants but it is a good quick substitution.
0 Comments
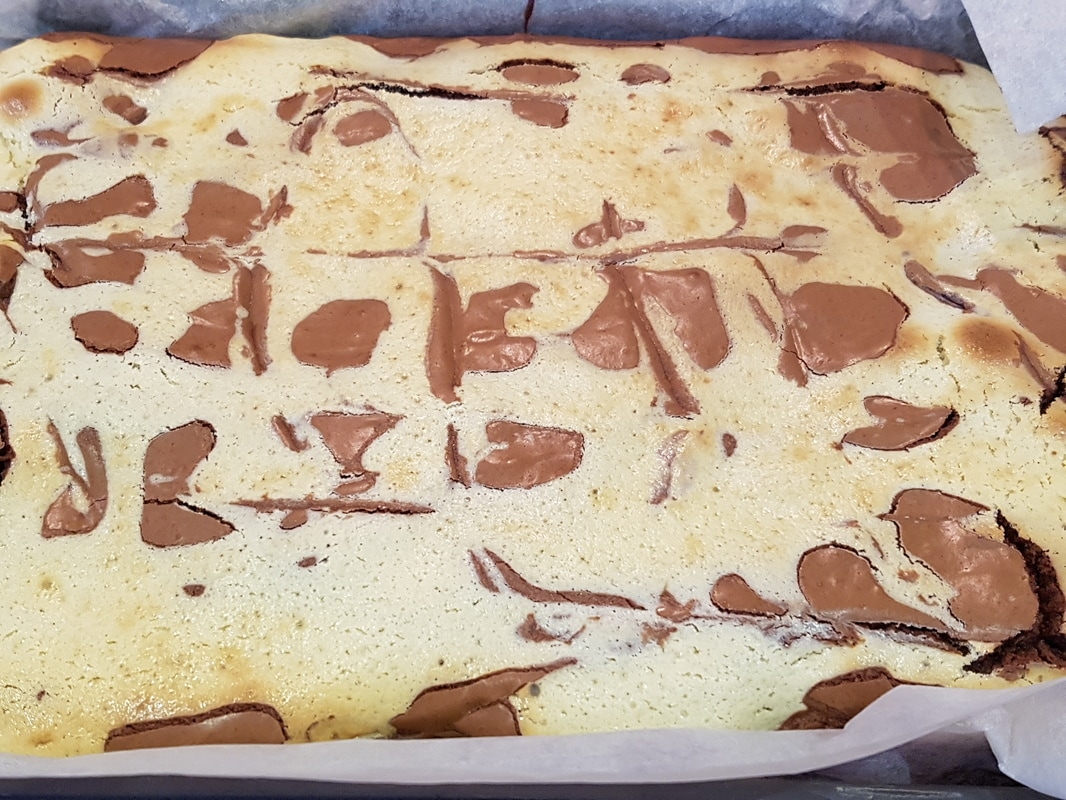
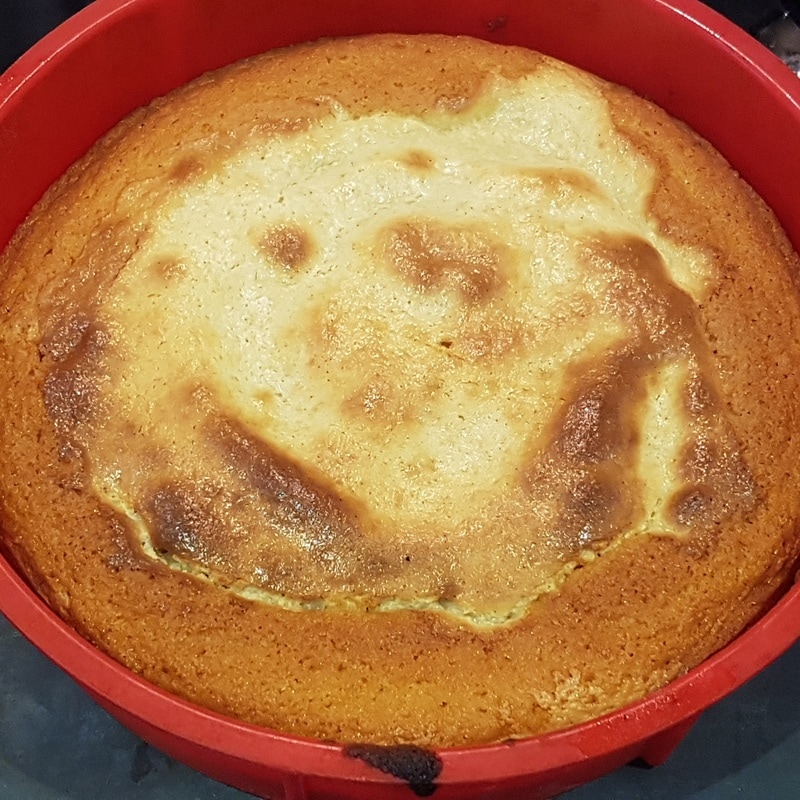
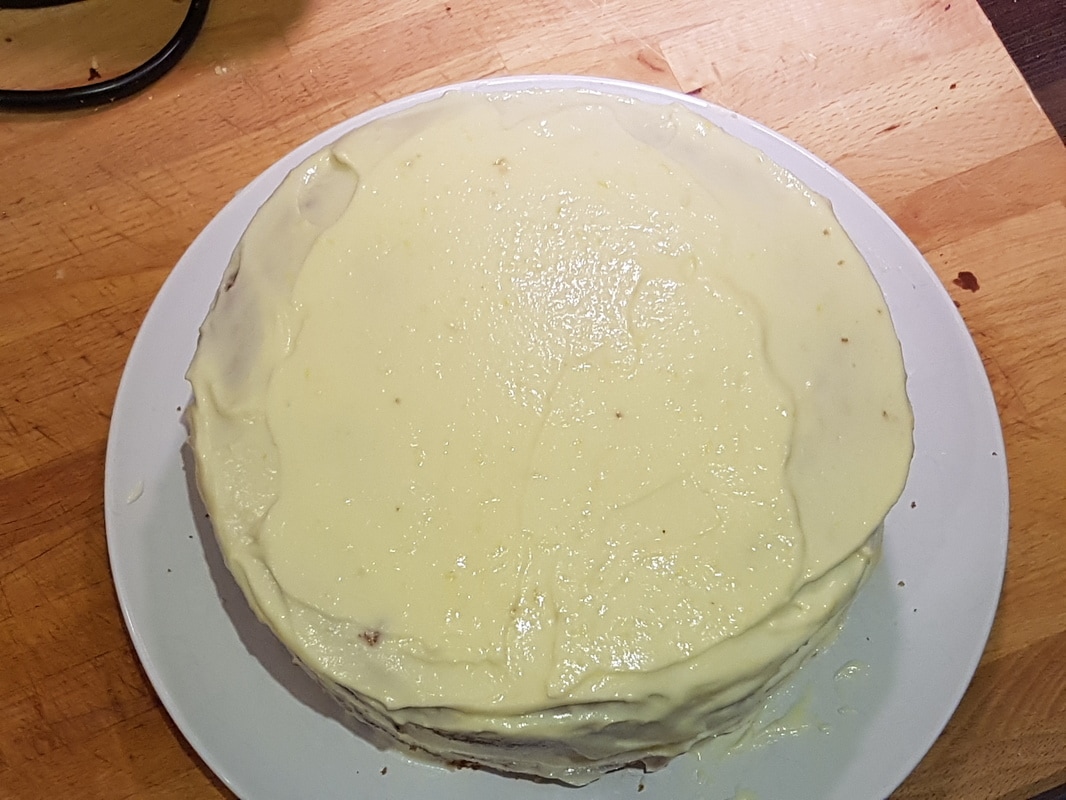
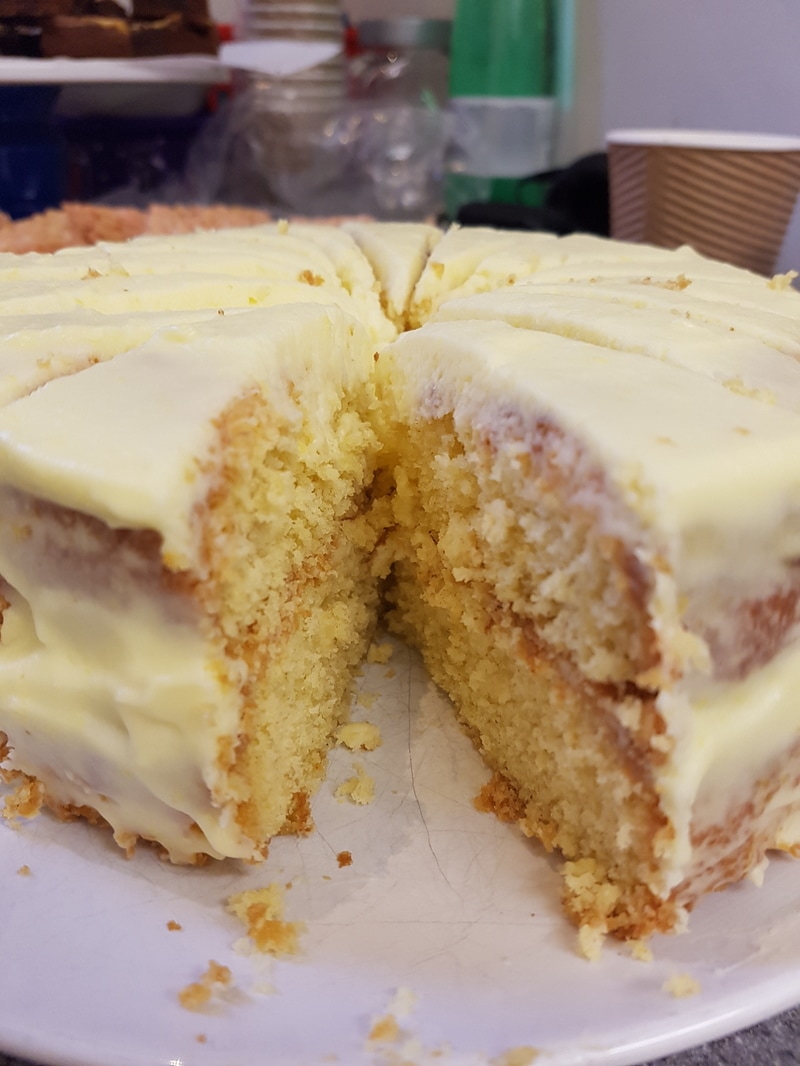
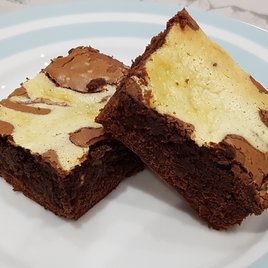 Last year March my sister Kate and I went to a Brownie Extravaganza class at Konditor and Cook in Southwark. What a fun evening! There were only four of us in the class but our teacher and her assistant were enthusiastic and a good comedy duo. We spend 90 minutes learning how to make their Boston brownies and Fudge Packer brownie. I ate the salted caramel sauce straight from the piping bag. I am not sure if any of you have noticed but this blog lacks some baking recipes and the reason, I am sad to say, is that I am not the worlds best baker. That is not to say I cannot bake but I tend to shy away from baking as I have had many a "whoops" moment in the kitchen. It is too precise an art for me and as a cook I tend to make it up as I go along which is where many of the problems start. Kyle will tell you that once upon a time, many moons ago, I tried to make Hertzoggies. These are delicious little jam tarts with a coconut meringue topping. I tried to make a double batch. Got as far as doubling the sugar in the recipe and then didn't double any of the other ingredients. They were a very sweet flop. Sad, but true. So this last weekend I decided to face up to my fears and bake. I started off thinking I would make the brownies, then a friend of ours Frankie said he would like something lemony, so I looked for lemons and lemon curd and cream cheese. 3 good ingredients to start with. Couldn't find lemon curd, bah humbug. I then saw marshmallows and Rice Crispies and immediately was transported back to my childhood with sticky fingers. Rice Crispie treats it would have to be, I got home and all hell broke loose in the kitchen. Not literally. I soon got covered in chocolate, had egg on my apron and flour in my hair. I made Konditor and Cook's Curly Whirly Brownies which I will not present to you here because the recipe is relatively easy to find online and I know others have blogged about them. Please see Sophie Loves Food.com for a blog on the brownies. As I said Frankie requested a little lemon delight to sample on Sunday and I obliged. I had to change from my original plan of vanilla cupcakes with lemon cream cheese frosting as I hadn't bought the lemon curd. The Curly Whirly brownie recipe calls for a "cheesecake" mix to be made as the decoration for the brownies and I had heaps left over. I got a little carried away with quantities. To the recipe books. Who is the queen of baking I thought to myself. Mrs Mary Berry the great. Low and behold "Bezza" had a recipe for all in one sponge, easy enough you think. It was, but in my moment of genius I added the rest of the cheesecake mix. Picture the emoji of the monkey with his hands over his eyes. I mixed the sponge, poured it into 2 separate cake tins and then poured the cheesecake mixture on top of each cake, baked them, cooled and covered with a lemon cream cheese icing. A star was born - Vanilla Cheesecake Sponge with Cream Cheese Icing. Please give this a try and let me know what you think. It is relatively simple and I didn't have any "whoops" moments. If I can do this, anyone can. I promise. Happy baking. Lots of love Nicolé Vanilla Cheesecake Sponge with Cream Cheese Icing Mary Berry's All In One Sponge 4 free-range eggs 225g/8oz caster sugar, plus a little extra for dusting the finished cake 225g/8oz self-raising flour 2 tsp Baking powder 225g/8oz Soft butter at room temperature, plus a little extra to grease the tins Preheat the oven to 180 degrees, 160 fan, gas mark 4. Grease and line 2 x 20 cm cake tins. Grease with a bit of butter or an oil based spray. Line the base of the tin with a circle of parchment paper. I have silicone cake tins and I still lined them with parchment, grease proof paper. Break the eggs into a large mixing bowl, add the sugar, flour, baking powder and butter. Mix everything together until well combined. The easiest is with an electric mixer. Just make sure you do not over work the mixture and this will make the cake dense and not light and fluffy. It should be a soft dropping consistency and fall off the spoon easily. Divide the mixture evenly between the tins, use a spatula to smooth the top of the cakes. This is where the twist comes in: beat together 200 grams of full fat cream cheese, 75 grams sifted icing sugar, seeds from a quarter of a vanilla pod - I used half a teaspoon of vanilla bean paste. And the yolk of 1 medium egg. Divide the cheesecake mix between the two sponges and smooth evenly over the top. Place the tins on the middle shelf of the oven and bake for 25 minutes. Do not open the oven while they are baking. When the cakes are done they should be golden brown, coming away from the edges and springy to the touch. Remove them from the oven and set aside to cool in their tins for 5 minutes. Then run a palette knife around the inside edge of the tin and carefully turn the cakes onto a cooling rack. Be careful as the cheesecake mix on top will still be soft and you do not want to mess it up. Set aside to allow them to cool completely. For the icing: 100 grams super soft unsalted butter 100 grams icing sugar 1 Tbsp lemon juice Zest of 1 lemon 200 grams full fat cream cheese Beat the butter using an electric hand mixer until it is smooth and flexible. Add the lemon juice and zest and beat together. Add the icing sugar slowly and beat into a soft buttercream icing. Add the cream cheese all in one go and mix in using a spoon you do not need a mixer at this stage. If too soft you can pop it back in the fridge to firm up. When the cakes are cool, spread a layer of icing on top on one of them with the cheesecake layer facing up. Then put the second cake on top. Smooth a layer of icing all over the cake and decorate as you wish. Slice, share and enjoy. PS Frankie went in for 3 slices, so I think it is safe to say that there were no "whoops" moments and I was quite proud of myself. Bon Appetit |
Archives
September 2020
Good food is very often, even most often, simple food. - Anthony Bourdain |


 RSS Feed